Sunday, 3 September 2017
Module Two. Chapter One, Task One
Colour Wheel One
* Re scanned image - changed the orange and tried to deepen the colours in the scanner settings.
Colour Wheel Two
Saturday, 19 August 2017
Module One, Chapter Six, Task 3
Sample 1
Multiple threads
Sewn directly onto a black calico sample page. I tacked six work areas and began with a running stitch 2.5, tension set to 1.
Changed to a normal foot 20 - as I had still used the pin tuck foot.
Chose a yellow and blue thread 0 tension for the triangle box.
The "bars" were yellow and variegated thread.
Box 4 was pink and variegated zig zag stitch 1.5 x 3.6.
Gold and purple metallic threads for the triangle shape.
Stitch number 3 and overlocking stitch 1.5 x 4.5 changing threads from gold/purple, pink/purple, multi/purple. All stitched well, no particular problems.
Sample 2
Cream calico samples x 4
Tried multiple rows of zig zag with yellow and reds changed to a blue in the centre and then back up to reds and yellow. The tension was tight - everything sews on calaico and cotton so much better on the backing felt. It was annoying as I was enjoying the results.
Second sample was the grid box using the overlocker stitch 3 again and varying the colours.
The third sample is my favorite and sewed the best. The honeycomb stitch I used variegated thread plus gold, sewed beautifully and a lovely effect.
Finally box 4 variegated thread and changed to dark red metallic the tension problems are obvious and I never really solved that problem. Was the stitch the wrong choice? Actually it didn't pucker but picked up the bobbin thread from under - quite nice really.
Sample 3
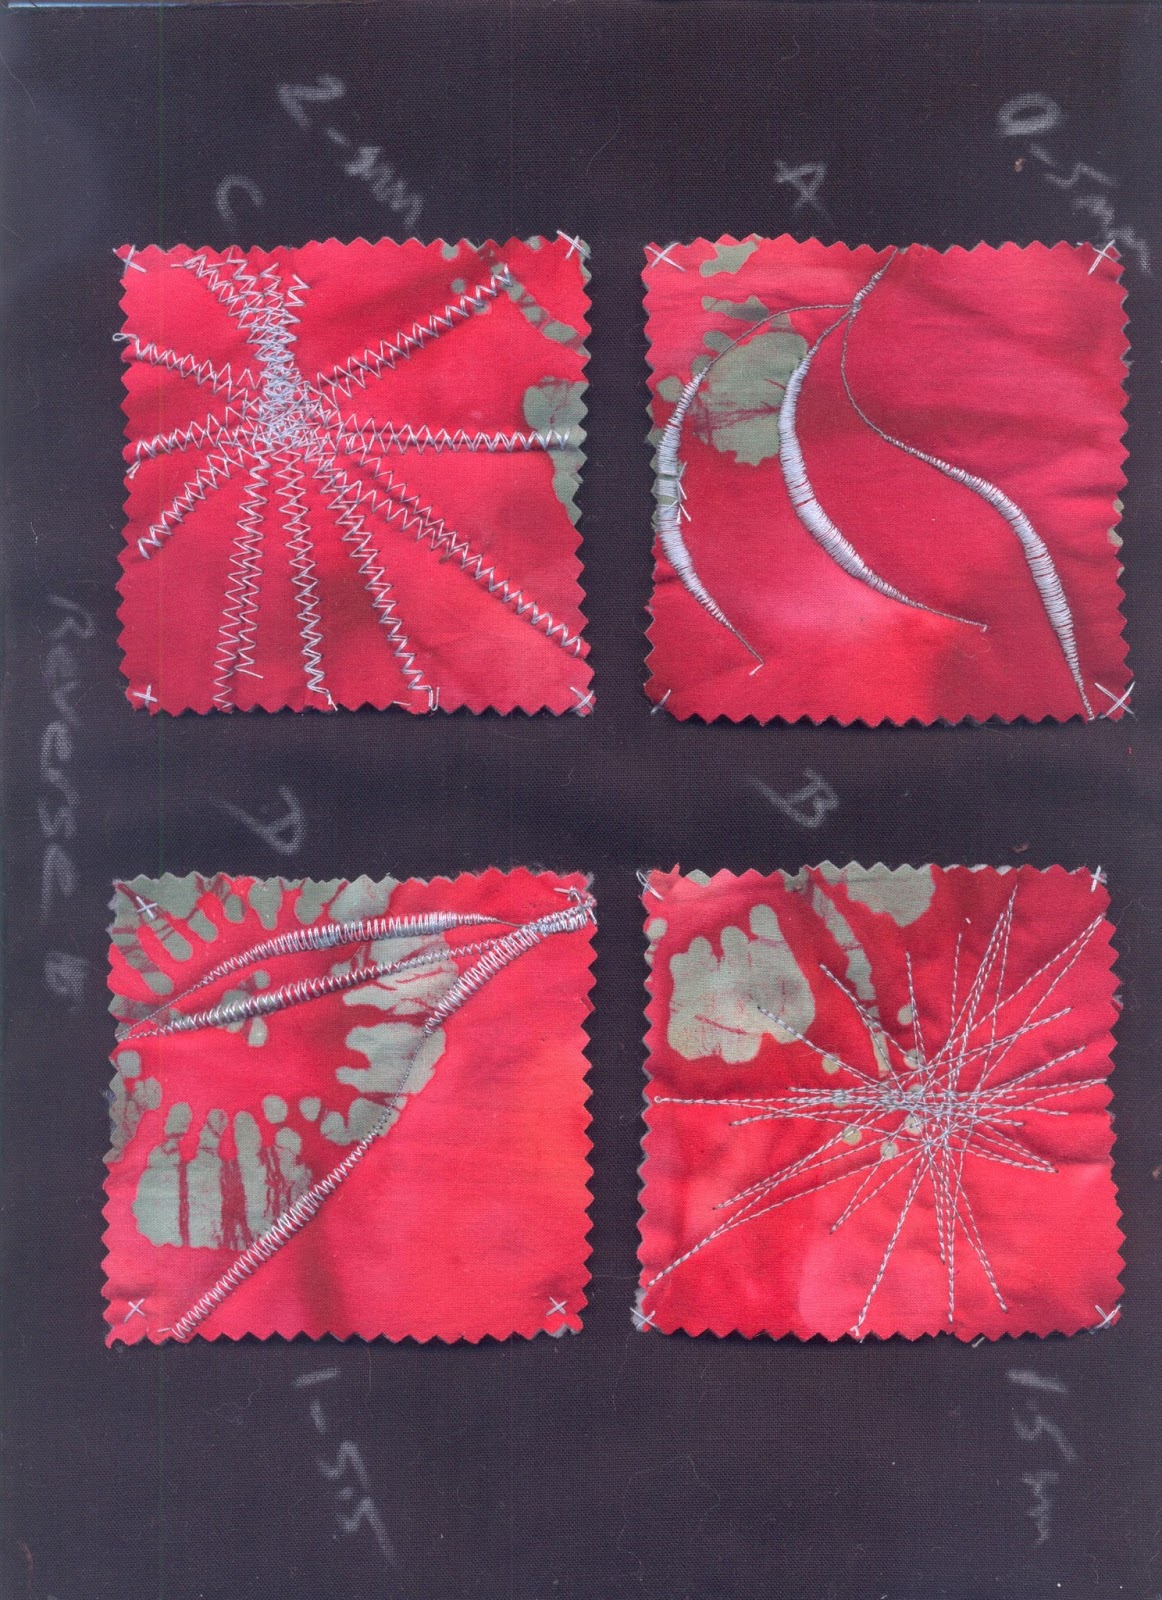
Red and grey patterned cotton fabric mounted on a black calico sample.
Began by sewing grey/ cream zig zag on the stem then grey/chocolate to deepen and finally red/chocolate. Cream bobbin thread showing through and tension a little tight.
Not much definition between the colours - bobbin would be better in a deeper colour (see outer circle of flower). Finished off with a gold metallic zig zag stitch 1.5 x 4.5.
I think this sample worked well - I used the pattern as my form to experiment and explore the stitch and colour of reds and browns.
I also used my embroidery hoop for the first time and this enabled me to get the finish I did. I quite like the slight pucker effect from the centre out as it mimicks the design.
Needle Notes
Module One, Chapter Six, Task 2 Twin Needle Fun
Sample 1
Using a 3.00mm pin tuck foot I stitched simple diagonal pin tucks with spaces in between using brown and orange threads with a brown bobbin.Then I experimented by ironing using spray starch and the lifted pin tucks became very flat.
The second is a double grid and retains the lifted pin tucks.
Sample 2
The sewn upside down "Arch" became very raised when the lines became closer in the top corner, I finished by dabbing with a cold tea bag.
The star shapes were sewn using reverse and forward stitching all over and again finished with a tea bag dye.
Sample 3
This sample was sewn in red and orange thread in tight clumps of rows but amongst the striped cotton fabric looked a little difficult to see the pin tuck effect. I changed from orange thread to blue which gives an overall look of purple thread now. I notice that in fact here as the picture file it appears better in its contrast to me now. I do like this however in hindsight I should have sewn from edge to edge as it was virtually impossible to stop in the line consistently.
Sample 4
I love this ones sense of line and its depth created by the two double wave lines crisscrossing the singles. Also, the wave on the stripe fabric shows the pin tuck sewing so much better close up. The bobbin was changed to brown and the top thread was orange.
Sample 5
Turquoise and green spot jersey fabric.
I tested a sample of zig zag before I began and realised this was going to be tricky. I have since acquired a "jersey" needle! However, I decided to try using ribbons as a stabiliser and as you can see the ribbon got caught up and dragged in at the sides. Running stitch pin tuck sewed not too badly on the jersey itself. Again though when I tried the ribbon in a running stitch pin tuck it bent and went all over the place.
Tried multiple rows of zig zag but this just flattened the fabric.
Tried a wavy double pin tuck but the fabric got completely pulled down between the feed dogs.
I ended up dismantling the machine.
I stitched some straight rows of zig zag afterwards just to make sure it was okay.
Sample 6
This was a pleasure to sew after the previous sample. Purple satin mounted on black calico sample page.
I did lots of rows of pin tuck using running and zig zag.
I decided later to go back to it and add the white rows of stitching the tulip design 104, the wave design 110 and finally the centre stem of leaves on a fine pink ribbon pattern number 137.
Sample 7
Calico sample with number 3 pin tuck foot using wool, embroidery threads and pipe cleaners.
The embroidery threads did not sew successfully - I thought they had but in fact they were not big enough for the pin tuck to catch. The wool and the pipe cleaners worked the best.
Module One, Chapter Six, Task 1, Nifty Needles
The
most suitable needles for Machine Embroidery are;
Topstitch
Needles;
Most commonly used are 80, 90, 100, 110.
Fine 60,
65, 70
Medium 75,
80, 90
Heavy 100,
110, 120
DO
NOT USE UNIVERSAL NEEDLES for machine embroidery.
Twin
Needles;
2/80
2.5/80 Narrow pin tucks on fabric
3/90 Topstitching and medium pin tucks on medium
fabric
4/90 Topstitching
and hems on medium weight fabrics
4/100 Heavy fabrics
2.5/75
4/75 Stretch
twin needles for Synthetics
3/90 Metallic
twin needles
NEVER
USE WITH A SPACE LARGER THAN 2.5MM FOR Zig Zag
Triple
Needle
3
rows of straight stitch 2.5/80
CHANGE
YOUR NEEDLE EVERY 8 HOURS OF STITCHING.
Health
and Safety;
Always dispose of used needles in a secure container and
expose of safely.
My
Pin Tuck foot is No 3;
Straight
Stitch length 2.0mm – 3.0mm
Double
Needle 1.6mm – 2.5mm
Spacing
foot 3 - 4mm
Thursday, 27 July 2017
Module One, Chapter 5, Task 2, Satin Stitch and Beyond
Fabrics Used;
- Dyed Satin
- Fine needlecord
- Canvas / Hessian
- T. Shirt
- Fine patterned cotton
- Small samples of patterned cotton
- Cord "type" fabric
- "
Sample 1 - Zig Zag
Yes I believe this works, the zig zag stitch is much stronger than a running stitch and even where I have used white cotton it still keeps its strong pattern and texture.
Sample 2 - Zig Zag / Satin Stitch
Successful - I enjoyed sewing this sample and testing the satin stitch to the full. It sewed very well on this fabric.
Sample 3 - Zig Zag
I was able to stitch well on this canvas and the strong zig zag showed up well, unlike the running stitch sample - the organza strips were to add some colour and texture. Even without the embellishment I think this has been successful.
Sample 4 - Zig Zag
Successful - This works much better than the running stitch easier to control and with the addition of the cut and frayed ribbon which got caught up in the sewing and twisted into a cording effect is much easier to want to look into it a bit further.
Sample 5 - Zig Zag
Successful - This is one of my favorites. I think it worked a bit by accident! I began by sewing on some grey ribbons going down the route of cording and then I started some open large zig zag stitches and the fabric began puckering and I loved it. Because it sort of shrank during the process, I then mounted it on a black calico sample page and it looked lost! So I tied it all together by sewing zig zag stitch in lines to join the two pieces together in both grey and red.Sample 6 - Running Stitch, Zig Zag Stitch and Satin Stitch
Successful - I created this page showing a sample of each stitch recording the sizes and using on each the reverse stitch option.Sample 7 - Running Stitch, Zig Zag Stitch and Satin Stitch
Unsuccessful - this is the first time I have used a cordroy type fabric and wanted to show a sample of it as you mentioned in my previous blog. The stitches in straight lines gathered fabric and were not successful.
Re worked
I was unhappy with the previous sample page above as the stitching was almost unrecognisable because the fabric was flimsy and the colour of the thread too pale.
Here is my re worked version (on the right) using strips of cotton binding, cotton striped fabric, pale ribbon, embroidery thread and a length of cord to better show the Satin Stitch and to make the fabric more stable.
Sample 8 - Cording and applique
Successful I think? Not really sure as the fabric was very unstable to sew on as flimsy not a true "cordroy" however I did think the corded thread worked as where I missed with the sewing machine the threads have frayed. The lace pieces sewed on easily and added a bit more interest.
Re worked
Here is my re worked version using wool, ribbon, lace, black fabric, red stripey and ribbon in various colours and shapes of satin stitch.
Thursday, 29 June 2017
Module One, Chapter 5, Task 1 Beyond the Straight and Narrow
Chapter 5, Task 1.Beyond the Straight and Narrow
Sample 1
Hand dyed silk (previously done) lightly sprayed onto a backing fabric.This is a bit of a mess as I began sewing in "boxes" again and I realised it is just not a big enough space to work in to show the stitch variances. So I abandoned the small working area at the bottom and stitched right across the rest of the fabric using between 2.0 and 5.0 mm running stitch and at the same time varying the spacing and direction of the stitch - the result was a pleasant surprise as it appears to have a "quilted" effect. The machine sewed well and no tension problems.
So in conclusion I must start to use whole sample pages and not chop it up into little bits.
I am happy with the stitch sizes and spacing but to have really shown this piece well a much deeper colour thread would have jumped out of the background.
Sample 2
For this sample I used a slightly stretchy lightweight cord fabric stitching waves in 3mm running stitch. Because of the stretch there is some unevenness and I was worried about puckering. The more I progressed the more puckering I got and with hindsight a backing fabric would have helped in this regard. Also I used the same "90" needle on this fabric - I am guessing I should have changed to a heavier weight needle.
Sample 3
This fabric is a very coarse cream weave (canvas). I tried using every combination of running stitch length and the result is bizarre.I found I could not sew a "straight" line - the fabric was literally swinging from left to right and the stitches are all uneven and wobbly! Very amusing.
Sample 4
After the last sample I thought I would play it safe and use a backing fabric under an old
T shirt remnant. I began with a tiny stitch and finished using a 5mm running stitch - a bit of disaster, really drab and very puckered because of the stretch even with the backing material. My observation is - this almost looks like pen and ink drawing now, the heavier stitched lines creating more shadow.
Sample 5
Sample 6
A dyed yellow cotton with stitch and tear backing.
Sample 6 is the right side and I scanned in the "wrong" side Sample 5 by accident.
However, they both have entirely different qualities and could be used I think either way or possibly folded and layered - the stitch quality was good and my observation of this sample is the differing "width" between the 3 lines of stitches gives a good perspective.
The fabric has puckered once again but I think this enhances the sample not detracts as it creates fabulous shadows.
Subscribe to:
Posts (Atom)